


Recipes


How to Make a Pumpkin Diaper CakeIntroduction to Pumpkin Diaper Cake
Pumpkin diaper cakes are delightful and practical gifts for baby showers. They not only serve as a charming centerpiece but also provide essential items for the newborn. Creating a pumpkin diaper cake is a fun and creative way to celebrate the arrival of a baby.
Materials Needed
Before embarking on this DIY project, gather the following materials:
– Diapers (size depends on preference)
– Rubber bands
– Cardboard or cake base
– Ribbons (orange and green)
– Decorative accessories (such as artificial flowers or baby toys)
– Hot glue gun (optional)
– Scissors
Step-by-Step Guide to Making a Pumpkin Diaper Cake
Choosing the Right Diapers
Start by selecting high-quality diapers in the desired size. Ensure they are clean and free from any damage.
Rolling Diapers
Roll each diaper tightly from the open end to the waistband. Secure the rolled diaper with a rubber band. Repeat this process for all the diapers.
Assembling the Base
Place a cardboard or cake base on a flat surface. Arrange rolled diapers around the edge of the base, forming the bottom layer. Secure them together with a large rubber band or ribbon.
Building Layers
Continue stacking rolled diapers on each other to create additional layers, forming a tiered structure. Gradually decrease the diameter of each layer to achieve the pumpkin shape.
Decorating with Ribbons and Accessories
Wrap orange and green ribbons around each layer to resemble the colors of a pumpkin. Add decorative accessories like artificial flowers, leaves, or baby toys to embellish the diaper cake further.
Tips for a Stunning Pumpkin Diaper Cake
– Use diapers of various sizes to create dimension and texture.
– Incorporate themed accessories, such as pumpkin-shaped rattles or baby booties.
– Experiment with different ribbon patterns and textures to personalize the design.
Variations and Creative Ideas
– Instead of traditional pumpkins, create themed diaper cakes like animals, cars, or princess castles.
– Customize the diaper cake to match the baby’s nursery decor or the shower theme.
– Include practical items like baby blankets, onesies, or feeding supplies within the layers for added functionality.
Occasions to Gift a Pumpkin Diaper Cake
Pumpkin diaper cakes are perfect for various occasions, including:
– Baby showers
– Gender reveal parties
– Welcome home celebrations for the newborn
– First birthdays
Read: How to Make a Tractor Diaper Cake
Conclusion
Crafting a pumpkin diaper cake is a delightful way to celebrate the joy of parenthood. With a bit of creativity and patience, you can create a charming and practical gift that the new parents will cherish.
FAQs [...]
Read more...
How to Get Bread Out of Loaf PanImagine the disappointment of baking a beautiful loaf of bread, only to find it stuck in the pan when it’s time to remove it. It’s a frustrating situation many homebakers have faced. But fear not, as there are several techniques you can employ to ensure your bread comes out of the loaf pan easily, preserving its shape and presentation.
Introduction to the Problem: Stuck Bread in a Loaf Pan
Getting bread from a loaf pan can sometimes feel like solving a puzzle. The bread may stick to the sides or bottom of the pan, making it challenging to remove without damaging its shape or texture. However, with the right approach and a few handy tricks, you can release your bread from the pan effortlessly.
Preparing the Loaf Pan for Easy Release
Before you even start baking, it’s essential to prepare your loaf pan to prevent the bread from sticking. There are a couple of methods you can use:
Greasing the Pan Properly
Coating the inside of the loaf pan with a layer of fat, such as butter, oil, or cooking spray, can create a non-stick surface that helps the bread slide out easily after baking.
Using Parchment Paper
Another effective way to prevent sticking is lining the loaf pan with parchment paper. Cut a piece of parchment paper to fit the bottom and sides of the pan, leaving some overhang for easy removal after baking.
Letting the Bread Cool Down
Once your bread is done baking, resist the urge to remove it from the pan immediately. Letting the bread cool down for a while in the pan allows it to contract slightly, making it easier to release without breaking apart.
Loosening the Edges
If your bread is still stuck in the pan after cooling down, you can try loosening the edges using one of the following methods:
Using a Butter Knife
Gently run a butter knife along the edges of the bread to loosen it from the sides of the pan. Be careful not to tear or deflate the bread while doing this.
Using a Spatula
A thin, flexible spatula can also be used to gently pry the bread away from the edges of the pan, helping to release it without causing damage.
Inverting the Pan
Once you’ve loosened the edges, place a cutting board or serving plate upside down on top of the loaf pan. Hold the pan and board securely together, then flip them over in one swift motion. With luck, the bread should slide out onto the board or plate.
Tapping and Shaking Technique
If the bread still refuses to budge, try gently tapping the bottom of the pan with your hand or on a solid surface. This can help dislodge the bread from the pan. You can also try shaking the pan gently from side to side to encourage the bread to release.
Using the Hot Water Bath Method
For particularly stubborn bread, you can try placing the bottom of the loaf pan in hot water for a few seconds. The heat can help soften the edges of the bread, making it easier to remove.
Freezing the Loaf Before Removal
In some cases, freezing the bread for a short time can make it easier to remove from the pan. Place the entire loaf pan in the freezer for 15-30 minutes, then try again to release the bread using one of the methods mentioned above.
Cutting the Bread Inside the Pan
If all else fails, you can resort to cutting the bread while it’s still in the pan. Use a sharp knife to carefully cut around the edges of the bread, then lift out the slices one by one.
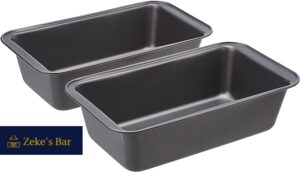
Special Loaf Pans for Easy Release
Alternatively, you can invest in special loaf pans designed for easy release. These pans often feature non-stick coatings or removable bottoms, making it effortless to remove the bread without any sticking.
Read The article: How to Make a Tractor Diaper Cake
Conclusion
Getting bread out of a loaf pan doesn’t have to be a stressful experience. By following these tips and techniques, you can ensure that your freshly baked bread comes out of the pan intact and ready to be enjoyed.
FAQs [...]
Read more...
How to Make a Bassinet Diaper CakeIntroduction
A bassinet diaper cake can be a charming and practical gift if you’re attending a baby shower or celebrating a newborn’s arrival. In this guide, we’ll walk you through making a stunning bassinet diaper cake that will impress any parent-to-be.
Materials Needed
Before diving into the steps, gather the following materials:
– Diapers (preferably size 1 or 2)
– Ribbon
– Rubber bands
– Cardboard or sturdy base
– Decorative accents (such as baby toys, pacifiers, or rattles)
– Adhesive tape
– Scissors
– Cake topper (optional)
Step 1: Roll the Diapers
Start by rolling each diaper tightly from the open end to the closed end. Secure each roll with a rubber band to maintain its shape.
Step 1.1: Determine the Number of Diapers
Decide how large you want your bassinet to be and estimate the number of diapers needed. Typically, a small bassinet requires around 25-30 diapers, while a larger one may need 50 or more.
Step 2: Create the Base
Take your cardboard or sturdy base and shape it into an oval or rectangular base, resembling the bottom of a bassinet. This will provide stability for your diaper cake.
Step 2.1: Cover the Base
If desired, cover the base with decorative paper or fabric to add a personalized touch to your bassinet.
Step 3: Build the Frame
Arrange the rolled diapers around the perimeter of the base, standing them upright to form the walls of the bassinet. Secure the diapers together with ribbon or rubber bands.
3.1: Stabilize the Frame
Use adhesive tape to secure the diapers to the base, ensuring that the frame remains sturdy and intact.
Step 4: Add Layers
Continue building upward by adding additional layers of rolled diapers, gradually decreasing the diameter to create the tapered shape of a bassinet.
Step 4.1: Maintain Symmetry
As you add layers, make sure to maintain symmetry and balance to achieve a visually appealing design.
Step 5: Decorate
Once the basic structure is complete, it’s time to decorate your bassinet diaper cake! Add ribbon bows, baby toys, pacifiers, and other decorative accents to embellish the cake.
Step 5.1: Personalize the Cake
Consider the color scheme and theme of the baby shower or nursery when selecting decorations to personalize the cake.
Step 6: Finishing Touches
To complete your bassinet diaper cake, add a cake topper if desired. This could be a plush toy, a miniature baby figurine, or a decorative accent that ties the theme together.
Read: How to Make a Tractor Diaper Cake
Conclusion
Creating a bassinet diaper cake is a delightful way to celebrate the impending arrival of a little one. With a few simple materials and a bit of creativity, you can craft a memorable and practical gift that the parents-to-be will cherish.
FAQs [...]
Read more...
How to Make a Tractor Diaper CakeHow to Make a Tractor Diaper Cake?
Tractor diaper cakes have become a popular and adorable gift for baby showers. These charming creations not only serve as a practical present but also double up as a delightful centerpiece for the celebration. If you’re looking to impress the parents-to-be with a unique and memorable gift, crafting a tractor diaper cake might be just the thing. In this guide, we’ll walk you through the process step by step, ensuring your creation is both eye-catching and functional.
Introduction to Tractor Diaper Cakes
Diaper cakes are a creative and practical way to gift diapers to new parents. They are made by rolling up individual diapers and arranging them into tiered cake-like structures. Tractor diaper cakes add a fun twist to this concept by shaping the diaper tiers into a tractor shape, complete with wheels, windows, and other decorative elements.
Choosing the Right Supplies
Before diving into the crafting process, gather all the necessary supplies. You’ll need:
### Diapers
Opt for high-quality diapers in various sizes, as you’ll need different sizes for the different tiers of the cake.
### Decorative Elements
Gather ribbons, toys, pacifiers, and other decorative items to embellish your tractor diaper cake.
### Base and Support Materials
You’ll need a sturdy base, such as a cake board or tray, to support your diaper cake. Additionally, gather rubber bands, tape, and glue to hold everything together.
Step-by-Step Guide to Making a Tractor Diaper Cake
### Creating the Base
Start by placing the largest tier of diapers (usually the bottom layer) in a circular pattern on the base. Secure them with rubber bands to form the foundation of your tractor.
### Rolling Diapers
Roll individual diapers tightly and secure them with rubber bands. Repeat this process until you have enough rolled diapers to form each tier of the tractor.
### Assembling the Tractor Structure
Stack the rolled diapers on the base, gradually decreasing the size of each tier as you move upwards to create the shape of a tractor.
### Adding Decorative Elements
Once the basic structure is in place, get creative with decorations. Add ribbons for the tractor’s “windows,” attach small toys or pacifiers as embellishments, and use colored ribbons to mimic the tractor’s detailing.
Tips for a Stunning Tractor Diaper Cake
Color Coordination: Choose diapers and decorations that complement each other for a cohesive look.
Personalized Touches: Incorporate items that reflect the parents’ interests or the baby’s nursery theme.
Creative Variation Ideas: Don’t be afraid to experiment with different shapes and designs for your tractor diaper cake.
Read: How to Make a 3-Tier Diaper Cake
Conclusion
Crafting a tractor diaper cake is a delightful celebration of a new arrival. With a bit of creativity and patience, you can create a unique and memorable gift that will delight the parents-to-be and guests alike.
FAQs [...]
Read more...
How to Make a 3 Tier Diaper CakeIntroduction to 3-Tier Diaper Cakes
Diaper cakes are delightful and practical gifts for baby showers or welcoming a newborn. Among the various designs, the 3-tier diaper cake stands out for its impressive appearance and functionality. Crafted from rolled diapers, adorned with ribbons, and often embellished with baby accessories, these cakes serve as eye-catching centerpieces while providing essential supplies for new parents.
Choosing the Right Supplies
To create a stunning 3-tier diaper cake, gather the following supplies
Diapers: Opt for size 1 or 2 diapers, ensuring an adequate quantity for each tier.
Ribbons and Decorative Elements: Select ribbons, bows, and embellishments in coordinating colors to match the theme.
Base Support: Use a sturdy base such as a cake stand, cardboard round, or serving platter to support the tiers.
Building the Base Tier
Begin by rolling individual diapers tightly from the open end to the folded edge. Secure each rolled diaper with a rubber band. Arrange the rolled diapers in a circle around the base support, ensuring a snug fit. Continue adding diapers until the desired width for the base tier is achieved.
Constructing the Second Tier
Repeat the rolling process with additional diapers for the second tier. Once rolled, secure them with rubber bands and arrange them neatly on top of the base tier. To enhance the appearance, insert decorative elements such as small toys or pacifiers between the diapers.
Completing the Top Tier
Roll a smaller quantity of diapers for the top tier to create a smaller circumference. Stack these rolled diapers on top of the second tier, ensuring stability. Add a final touch of elegance by incorporating decorative accents or a plush toy at the crown of the cake.
Decorating the Entire Diaper Cake
After assembling the tiers, adorn the diaper cake with ribbons, bows, and other decorative elements. Wrap ribbon around each tier, securing it with double-sided tape or glue. Personalize the cake by adding baby items such as socks, bibs, or rattles to the design.
Tips for a Professional Finish
Achieve a polished look for your 3-tier diaper cake with these expert tips:
Keeping Layers Neat and Tidy: Ensure each layer is uniform and tidy by arranging diapers evenly and securing them tightly.
Ensuring Stability: Prevent the tiers from shifting by using adhesive or tape to secure them to the base support.
Adding Finishing Touches: Enhance the visual appeal of the diaper cake with additional embellishments such as silk flowers, tulle, or themed decorations.
Read: How to Make a Jeep Diaper Cake
Conclusion
Crafting a 3-tier diaper cake is a creative and enjoyable way to celebrate a new arrival. With the right supplies and a little imagination, you can create a stunning centerpiece that doubles as a practical gift for new parents.
FAQs [...]
Read more...
Indoor Kitchen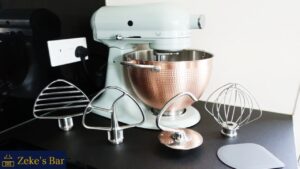
Can a KitchenAid Mixer Bowl Go in the Dishwasher?Can a KitchenAid Mixer Bowl Go in the Dishwasher?
If you’re one of the many people who own a KitchenAid mixer, you’ve likely wondered, “Can a KitchenAid mixer bowl go in the dishwasher?” This is a common question, and the answer varies depending on the material of your bowl. Let’s break it down.
What is a KitchenAid Mixer Bowl Made Of?
KitchenAid mixer bowls come in different materials, and knowing which one you have is essential for deciding whether it’s dishwasher-safe.
Stainless Steel Bowls
Stainless steel is a durable, rust-resistant material, making it a popular choice for KitchenAid mixer bowls. These bowls are perfect for heavy-duty mixing and can withstand high temperatures.
Glass Bowls
Glass bowls are another option and offer the benefit of being microwave-safe. They’re ideal for recipes requiring a precise view of the mixing process.
Ceramic Bowls
Ceramic bowls are both beautiful and functional. They are often favored for their aesthetic appeal, and some models come with decorative designs that can add flair to your kitchen.
Are KitchenAid Mixer Bowls Dishwasher Safe?
Whether your KitchenAid mixer bowl is dishwasher-safe depends entirely on its material and the manufacturer’s recommendations. Let’s dive into each material to explore its compatibility with dishwashers.
Can You Put a Stainless Steel KitchenAid Mixer Bowl in the Dishwasher?
Yes, most KitchenAid stainless steel mixer bowls are dishwasher safe. They’re designed to handle the heat and pressure of dishwasher cycles without suffering damage.
However, frequent dishwasher use may dull the polished finish of your bowl over time. To preserve its shiny appearance, you might want to hand wash it occasionally. Avoid using harsh detergents, as they can cause pitting or discoloration in stainless steel over time.
Can You Put a Glass KitchenAid Mixer Bowl in the Dishwasher?
Yes, KitchenAid glass bowls are generally dishwasher-safe. Glass is sturdy, and many KitchenAid glass bowls are designed to handle the heat and water pressure of a dishwasher.
However, be cautious. Even though glass is durable, it’s still prone to cracking or chipping if the bowl is placed too close to other dishes or if the dishwasher is overcrowded. To avoid accidental breakage, ensure there’s enough space around the bowl in the dishwasher.
Can You Put a Ceramic KitchenAid Mixer Bowl in the Dishwasher?
While KitchenAid ceramic bowls are also labeled as dishwasher-safe, they can be more susceptible to damage than stainless steel or glass bowls. The decorative designs on some ceramic bowls can fade after prolonged exposure to hot water and detergents. Also, sudden temperature changes in the dishwasher may cause cracks or crazing in the ceramic.
To maintain your ceramic KitchenAid bowl’s beauty, hand washing with warm water and mild detergent is often recommended.
How to Properly Clean a KitchenAid Mixer Bowl
Regardless of whether you use a dishwasher or hand-wash your mixer bowl, it’s essential to clean it properly after every use. Here’s how:
Stainless Steel: Use mild dish soap and a non-abrasive sponge. If hand-washing, dry it immediately to prevent water spots.
Glass: Glass bowls can be washed with warm water and detergent. Avoid abrupt temperature changes to prevent cracking.
Ceramic: Hand wash with a soft sponge and mild soap to protect the glaze and designs.
Dishwasher-Safe Attachments and Accessories
While the mixer bowl is a focus, you might wonder about other parts of your KitchenAid mixer. Good news! Many KitchenAid mixer attachments, such as the dough hook and flat beater, are also dishwasher-safe. However, always check the product manual for each specific accessory, as some may require hand-washing.
How Dishwashers Can Affect Different Materials
Dishwashers are convenient but can be harsh on different materials. Detergents contain chemicals that might corrode metals, dull finishes, or leave residue on glass and ceramics. High heat in the drying cycle can warp or weaken materials over time. Always be
aware of the settings on your dishwasher, and consider using gentler cycles for delicate items like glass or ceramic bowls.
Best Practices for Keeping Your KitchenAid Mixer Bowl in Great Shape
To keep your KitchenAid mixer bowl looking and performing its best, follow these simple tips:
Stainless Steel: Avoid using steel wool or abrasive cleaners to prevent scratching. Regularly polish with a stainless steel cleaner to maintain shine.
Glass: Handle with care, especially in the dishwasher. If you notice small cracks, it’s safer to replace the bowl before it breaks completely.
Ceramic: Never use harsh chemicals or abrasive tools that could damage the finish. Protect it from sudden temperature changes, and store it in a safe spot where it won’t get knocked over.
Alternatives to Dishwasher Cleaning
Not everyone is comfortable putting their mixer bowl in the dishwasher, especially if they’re concerned about potential damage. Here are some hand-washing alternatives that are just as effective:
Mild Dish Soap: Mix a few drops of mild dish soap with warm water. Use a soft sponge to scrub away residue, and dry immediately to avoid water spots.
Baking Soda Paste: For stubborn stains or stuck-on food, create a paste with baking soda and water. Gently scrub the bowl, rinse thoroughly, and dry.
Vinegar Rinse: If odors are a concern, rinse your bowl with a mixture of water and white vinegar. This natural cleaner helps eliminate smells and sanitizes the surface.
What Happens if You Accidentally Put a Non-Dishwasher-Safe Bowl in the Dishwasher?
Accidents happen! If you’ve accidentally placed a non-dishwasher-safe bowl in the dishwasher, don’t panic. Check the bowl for any visible signs of damage, like cracks, chips, or discoloration. If the bowl seems fine, continue using it, but keep an eye out for future issues.
If the bowl has suffered any noticeable damage, it’s often best to replace it. Continuing to use a compromised bowl could lead to food safety concerns or further damage to your mixer.
Common Mistakes When Cleaning a KitchenAid Mixer Bowl
Here are some common pitfalls to avoid when cleaning your KitchenAid mixer bowl:
1. Using Harsh Detergents: Strong chemicals can damage stainless steel or fade the colors of ceramic bowls.
2. Overloading the Dishwasher: Ensure your bowl has space around it to avoid scratches or chips from other dishes.
3. Ignoring Manufacturer Instructions: Always refer to your product manual to ensure you’re cleaning your mixer bowl and attachments correctly.
User Experiences and Reviews
Many KitchenAid users have shared their experiences with cleaning their mixer bowls. Most report positive results from using the dishwasher, especially with stainless steel and glass bowls. However, ceramic bowl owners often recommend hand-washing to preserve the designs and prevent cracks. Overall, the consensus is that while the dishwasher is a convenient option, hand washing may extend the lifespan of your bowl.
Read: How to Bake in Paper Loaf Pans: Mastering the Art
Conclusion
So, can a KitchenAid mixer bowl go in the dishwasher?** The answer largely depends on the material. Stainless steel and glass bowls are generally dishwasher-safe, but ceramic bowls require more care. To keep your KitchenAid mixer bowl in top condition, always follow the manufacturer’s guidelines and choose the cleaning method that works best for your specific bowl.
When in doubt, hand-washing is the safest option to ensure the longevity and appearance of your bowl.
Reference
FAQs [...]
Read more...
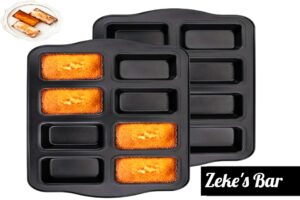
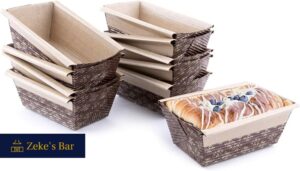
How to Bake in Paper Loaf Pans: Mastering the ArtIntroduction: how to bake in paper loaf pans
Baking in paper loaf pans offers convenience, versatility, and an eco-friendly alternative to traditional metal pans. Whether you’re a seasoned baker or just starting out, mastering the technique of baking in paper loaf pans can elevate your baking creations to new heights. In this guide, we’ll delve into the intricacies of baking in paper loaf pans, providing you with expert tips, step-by-step instructions, and answers to frequently asked questions. Let’s embark on a journey to unlock the secrets of perfect paper pan baking!
Choosing the Right Paper Loaf Pan
Baking success begins with selecting the right paper loaf pan. Here’s what to consider:
Quality Matters:
Invest in sturdy, high-quality paper loaf pans to ensure even baking and easy release.
Size Selection:
Choose the appropriate size for your recipe, ensuring the pan is filled to the recommended level for optimal results.
Greasing or Lining?:
Decide whether to grease the paper pan or use parchment paper for easy removal and cleanup.
Preparing Your Batter
Achieving the perfect batter consistency is crucial for successful baking. Follow these steps:
Mixing Method:
Opt for the creaming method for cakes or the muffin method for quick bread for best results.
Incorporating Ingredients:
Gradually add dry ingredients to wet, mixing until just combined to avoid overmixing.
Folding Techniques:
Master the art of gentle folding to maintain airiness and prevent deflation of delicate batters.
Baking in Paper Loaf Pans
Now, let’s dive into the baking process itself:
Preheating the Oven:
Ensure your oven is preheated to the correct temperature as per your recipe for consistent results.
Filling the Pan:
Fill the paper loaf pan with batter, leaving space for expansion during baking.
Baking Time and Temperature:
Follow the recipe guidelines for baking time and temperature, adjusting as needed for your specific oven.
Achieving Perfect Results
Unlock the secrets to perfectly baked treats with these expert tips:
Testing for Doneness:
Use a toothpick or cake tester to check for doneness, ensuring it comes out clean or with a few moist crumbs.
Cooling and Unmolding:
Allow your baked creation to cool in the pan before gently removing and transferring to a wire rack.
Storage and Serving Suggestions:
Store leftover treats in an airtight container and enjoy within a few days for optimal freshness.
Conclusion
Mastering the art of baking in paper loaf pans opens up a world of possibilities for home bakers. With the right techniques and tools, you can create delicious treats with ease and convenience. Remember to choose quality pans, prepare your batter with care, and follow baking best practices for perfect results every time. Whether you’re whipping up a batch of banana bread or a decadent chocolate cake, paper loaf pans are sure to become a staple in your kitchen arsenal.
Read the article “How L-shaped outdoor kitchen”
[...]
Read more...
Outdoor Kitchen

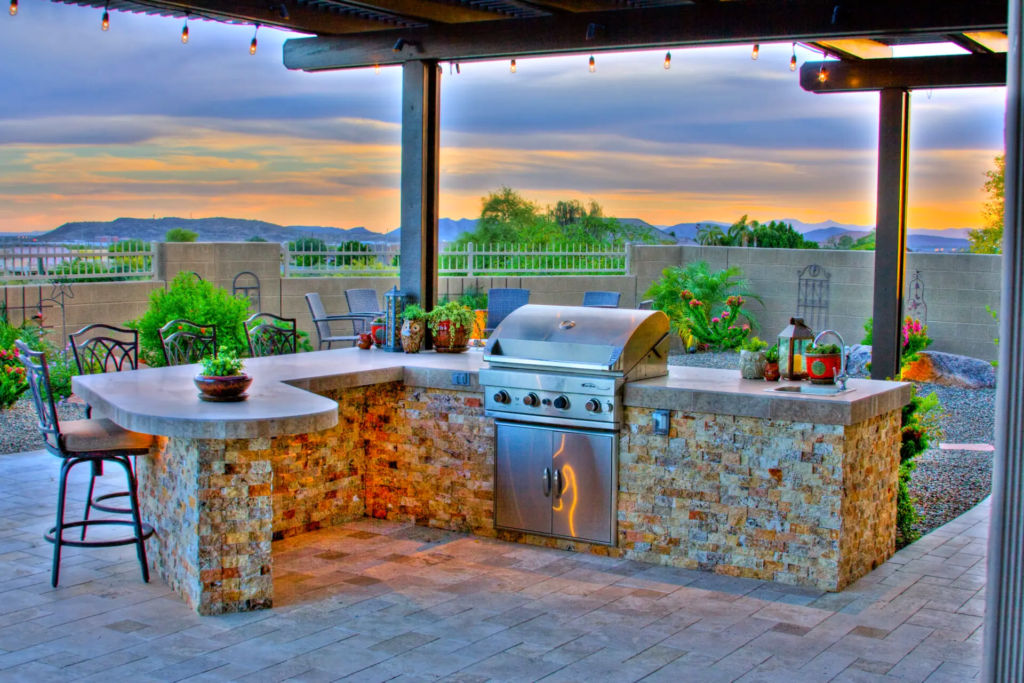
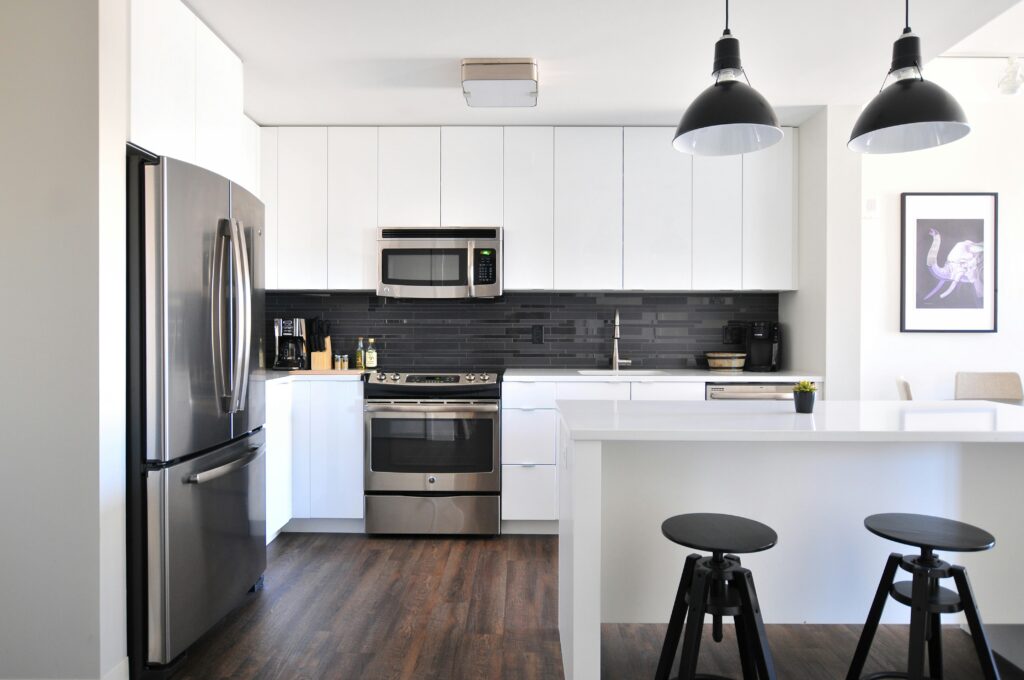
Modern L-shaped Outdoor KitchenIntroduction to Modern L-Shaped Outdoor Kitchens
In recent years, the concept of outdoor kitchens has undergone a significant transformation. No longer confined to simple grilling stations, modern outdoor kitchens have evolved into sophisticated, fully functional culinary spaces that rival their indoor counterparts. Among the various layouts available, the L-shaped design stands out for its versatility and aesthetic appeal. In this comprehensive guide, we delve into the world of modern L-shaped outdoor kitchens, exploring their design elements, benefits, planning considerations, and much more.
Design Elements of Modern L-Shaped Outdoor Kitchens
When envisioning a modern L-shaped outdoor kitchen, several design elements come into play. The layout and configuration of the kitchen are paramount, ensuring seamless workflow and optimal utilization of space. Additionally, the choice of materials, ranging from stainless steel to natural stone, contributes to the overall aesthetic and durability of the kitchen.
Benefits of Modern L-Shaped Outdoor Kitchens
One of the primary advantages of modern Outdoor kitchens designed in an L-pattern is their enhanced functionality. With designated zones for cooking, prep work, and dining, these kitchens streamline the outdoor culinary experience. Furthermore, they expand the usable living space, creating an inviting environment for entertaining guests and enjoying al fresco dining.
Factors to Consider When Planning a Modern L-Shaped Outdoor Kitchen
Before embarking on the journey of creating a modern L-shaped outdoor kitchen, it’s essential to consider various factors. Budget constraints, climate considerations, and local regulations play a crucial role in determining the feasibility and scope of the project.
Key Features to Include in a Modern L-Shaped Outdoor Kitchen
To ensure the functionality and efficiency of a modern L-shaped outdoor kitchen, certain key features must be incorporated. These include dedicated grilling stations, ample countertop space for food preparation, and innovative storage solutions to keep utensils and cooking essentials within reach.
Tips for Maximizing Space and Efficiency
In the realm of outdoor kitchen design, maximizing space and efficiency is paramount, especially in L-shaped configurations. Clever utilization of corners, integration of multifunctional elements, and strategic placement of appliances are some effective strategies for optimizing the available space.
Popular Styles and Themes for Modern L-Shaped Outdoor Kitchens
Modern L-shaped outdoor kitchens come in a variety of styles and themes to suit different aesthetic preferences. From sleek and contemporary designs featuring clean lines and minimalist aesthetics to rustic themes that embrace natural materials and textures, there’s a style to cater to every taste.
Maintenance and Care for Modern Outdoor Kitchens
Proper maintenance and care are essential for preserving the beauty and functionality of a modern outdoor kitchen. Regular cleaning and routine maintenance help protect against the wear and tear caused by exposure to the elements, ensuring longevity and performance.
Cost Analysis: Budgeting for a Modern L-Shaped Outdoor Kitchen
When budgeting for a modern L-shaped outdoor kitchen, it’s crucial to factor in various costs, including materials, appliances, labor, and permits. By carefully planning and prioritizing expenditures, homeowners can create a luxurious outdoor culinary space without breaking the bank.
Installation Process: What to Expect
The installation process of a modern L-shaped outdoor kitchen can vary depending on factors such as complexity, size, and customization. While some homeowners may opt for professional installation services, others may choose the DIY route, guided by comprehensive installation guides and tutorials.
Real-Life Examples and Case Studies
To inspire and inform prospective homeowners, real-life examples and case studies showcasing successful installations of modern L-shaped outdoor kitchens can be invaluable. These examples highlight innovative design concepts, practical solutions, and the transformative impact of outdoor kitchen projects.
Environmental Impact: Sustainability in Outdoor Kitchen Design
With a growing emphasis on sustainability and eco-conscious living, incorporating green practices and materials into outdoor kitchen design is becoming increasingly prevalent. From using recycled materials to installing energy-efficient appliances, there are numerous ways to minimize the environmental footprint of outdoor kitchens.
Future Trends in Modern L-Shaped Outdoor Kitchens
As technology advances, the future of modern Outdoor kitchens designed in an L-pattern holds exciting possibilities. Integration of smart technology, such as automated cooking systems and remote-controlled appliances, promises to enhance convenience and efficiency, ushering in a new era of outdoor culinary experiences.
Customer Testimonials and Reviews
The satisfaction and experiences of homeowners who have invested in Outdoor kitchens designed in an L-pattern provide valuable insights and testimonials. By sharing their firsthand experiences, these homeowners offer prospective buyers valuable perspectives and considerations for their outdoor kitchen projects.
Read – How to make an L-shaped outdoor kitchen
Conclusion
In conclusion, modern L-shaped outdoor kitchens represent outdoor culinary luxury and functionality. From their versatile design and innovative features to their ability to enhance outdoor living spaces, these kitchens offer many benefits for homeowners seeking to elevate their outdoor entertaining experience.
reference: The ultimate guide to L-Shaped Outdoor Kitchens
FAQs [...]
Read more...
How L-shaped outdoor kitchenIntroduction to L-shaped outdoor kitchens
Outdoor kitchens have become increasingly popular in recent years, offering a seamless blend of cooking, dining, and entertaining in the great outdoors. Among the various layouts available, the L-shaped outdoor kitchen stands out for its versatility and functionality.
Benefits of L-shaped outdoor kitchens
The L-shaped design maximizes space efficiency while providing ample room for cooking and socializing. It offers better traffic flow compared to other layouts, allowing for easy movement between different cooking and prep areas.
Design considerations for L-shaped outdoor kitchens
### Space utilization
Utilizing the available space efficiently is crucial when designing an L-shaped outdoor kitchen. Consider the dimensions of your outdoor area and how the kitchen will fit into the overall layout.
### Layout options
There are numerous layout options for L-shaped outdoor kitchens, ranging from simple designs with a single counter to more elaborate setups with multiple cooking stations and seating areas.
### Appliances and features
When planning your L-shaped outdoor kitchen, think about the appliances and features you want to include. Common additions include grills, sinks, refrigerators, and storage cabinets.
Materials for building L-shaped outdoor kitchens
### Countertops
Choose durable and weather-resistant materials for your L-shaped outdoor kitchen countertops, such as granite, concrete, or stainless steel.
### Cabinets
Opt for materials that can withstand outdoor elements, such as stainless steel or marine-grade polymer cabinets.
### Flooring
Select flooring materials that are slip-resistant and easy to clean, such as porcelain tile, stamped concrete, or natural stone.
Lighting and ambiance in L-shaped outdoor kitchens
Proper lighting is essential for both safety and ambiance in L-shaped outdoor kitchens. Incorporate a mix of task lighting, ambient lighting, and decorative fixtures to create the perfect atmosphere.
Maintenance and cleaning tips
Regular maintenance is key to keeping your L-shaped outdoor kitchen looking its best. Clean surfaces and appliances regularly, and protect them from the elements when not in use.
Cost factors to consider
The cost of building an L-shaped outdoor kitchen can vary widely depending on factors such as size, materials, and features. Consider your budget carefully and prioritize essential elements.
Popular L-shaped outdoor kitchen designs
From sleek and modern to rustic and cozy, there are endless design possibilities for L-shaped outdoor kitchens. Explore different styles and themes to find inspiration for your own space.
Case studies: Real-life examples
Take inspiration from real-life examples of L-shaped outdoor kitchens, showcasing innovative design solutions and creative use of space.
Tips for planning and building your L-shaped outdoor kitchen
Consult with professionals to ensure that your L-shaped outdoor kitchen meets your specific needs and preferences. Consider factors such as local building codes, zoning regulations, and permits.
Hiring professionals vs. DIY approach
Decide whether to hire professionals or take the DIY approach when building your L-shaped outdoor kitchen. While hiring experts can ensure quality and efficiency, DIY projects can be rewarding and cost-effective.
Maximizing functionality in small spaces
Even in small outdoor areas, it’s possible to create a functional and stylish L-shaped kitchen. Optimize space with clever storage solutions, compact appliances, and multifunctional furniture.
Trends in L-shaped outdoor kitchen designs
Stay up-to-date with the latest trends in L-shaped outdoor kitchen designs, such as integrated smart technology, sustainable materials, and customizable features.
Eco-friendly options and sustainability
Consider eco-friendly options and sustainable practices when designing and building your L-shaped outdoor kitchen. Choose energy-efficient appliances, renewable materials, and water-saving fixtures.
You Can also read the article for detail: The Ultimate Guide to the L-Shaped Outdoor Kitchen
Conclusion: Enjoying your L-shaped outdoor kitchen to the fullest
An L-shaped outdoor kitchen offers the perfect blend of style, functionality, and versatility for outdoor living. With careful planning and design, you can create a space that enhances your outdoor experience and brings friends and family together for years to come.
Read the article – Can I bake sourdough in a loaf pan [...]
Read more...
Kitchen Equipment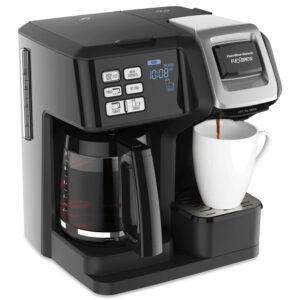
Great Coffee Makers Under $100Introduction
Great Coffee Makers Under $100
Finding a great coffee maker under $100 can feel like hunting for a needle in a haystack. With so many models on the market, how do you know which one will give you that rich, delicious cup of coffee without breaking the bank? The good news is, there are plenty of budget-friendly options that don’t compromise on quality. Let’s dive into what you should look for, and check out some of the best picks available right now.
What to Look for in a Budget Coffee Maker
Buying a coffee maker for under $100 doesn’t mean you have to settle for less. Many affordable models offer excellent performance, reliability, and great-tasting coffee. Here are a few things to keep in mind when shopping.
Essential Features of the Best Coffee Makers
Whether you’re a casual coffee drinker or can’t function without their morning brew, it’s important to consider a few key features.
Brew Quality
Even at a lower price point, you can find coffee makers that brew coffee just as well as their expensive counterparts. Look for models that offer consistent water temperature and a good brewing process. A higher-quality filter or brewing technology can make a big difference.
Durability and Build Quality
While budget coffee makers aren’t usually built to last decades, you can find sturdy options that withstand daily use. Look for machines made from good quality plastic or stainless steel that feel solid when you handle them.
Ease of Use and Cleaning
If your coffee maker is too complicated, it might gather dust on the counter. Look for simple controls and easy-to-read buttons or indicators. Cleaning should also be straightforward, especially if you use it daily. A removable drip tray or filter basket can make cleanup a breeze.
Types of Coffee Makers Under $100
Various coffee makers are available for under $100, each offering different advantages based on your coffee preferences.
Drip Coffee Makers
Drip coffee makers are classic and reliable. They’re perfect for brewing multiple cups at once and are ideal for families or frequent coffee drinkers. Many models now come with programmable features, so you can wake up to a fresh pot.
Single-Serve Coffee Makers
Single-serve coffee makers are great for individuals who want their coffee quick and easy. These machines are compact, convenient, and can brew a cup in just a couple of minutes. Look for models that are compatible with reusable pods to save money and reduce waste.
French Press Coffee Makers
French press coffee makers provide a rich, full-bodied cup of coffee that many enthusiasts swear by. They’re simple, don’t require electricity, and are perfect for people who enjoy hands-on brewing. Plus, they are typically very affordable.
Top 5 Coffee Makers Under $100
Here are five top-rated coffee makers under $100 that deliver excellent value without sacrificing quality.
1. Hamilton Beach 49976 FlexBrew
The Hamilton Beach FlexBrew is versatile, offering both single-serve and full-pot brewing options. It’s compatible with both K-Cups and ground coffee, making it perfect for households with different brewing preferences.
*Official site for the product: Hamilton Beach 49976 FlexBrew *You can find it on Amazon for under $100
2. Black+Decker 12-Cup Programmable Coffee Maker
This Black+Decker model is a workhorse, with a 12-cup capacity and a user-friendly interface. It’s programmable, so you can set it to start brewing before you wake up, and it has a sneaky “sneak-a-cup” feature for grabbing a quick cup before brewing is complete.
*Official site for the product: Black+Decker 12-Cup Programmable Coffee Maker *You can find it on Amazon
3. Mr. Coffee 12-Cup Coffee Maker
Mr. Coffee is a household name, and this model lives up to the brand’s reputation for simplicity and reliability. It’s affordable, brews a great pot of coffee, and has a straightforward design that makes it easy to use and clean.
*Official site for the product: Mr. Coffee 12-Cup Coffee Maker *You can find it on Amazon
4. CHULUX Single Serve Coffee Maker
If you prefer single-serve, the CHULUX Coffee Maker is an excellent budget-friendly option. It’s compact, easy to use, and compatible with most coffee pods. Perfect for small kitchens or for anyone who wants a quick cup on the go.
*Amazon: CHULUX Single Serve Coffee Maker
5. Bodum Brazil French Press
For those who enjoy a more manual brewing process, the Bodum Brazil French Press is an affordable, durable option. It’s simple to use and delivers a rich, flavorful coffee every time. Plus, it’s easy to clean and doesn’t require any paper filters.
*Official site for the product: Bodum Brazil French Press *You can find it on Amazon
Comparison of Coffee Makers Under $100
Brew Time and Capacity
Drip coffee makers generally brew more coffee at once, making them ideal for households or offices. Single-serve machines, on the other hand, are faster but brew just one cup at a time. French presses offer a unique balance, allowing for multiple cups while giving you control over the brew time.
Energy Efficiency
Single-serve machines tend to be more energy-efficient since they only heat the amount of water needed for each cup. Drip coffee makers often have warming plates that can consume more energy if left on for long periods.
Versatility
Models like the Hamilton Beach FlexBrew stand out for their versatility, allowing users to switch between single-serve and full pot brewing. This is a great feature if you have varied coffee needs throughout the day.
Pros and Cons of Budget Coffee Makers
The Pros: Affordability, Simplicity, and More
One of the biggest advantages of budget coffee makers is their affordability. Many models under $100 provide all the essentials, from programmable features to decent brew quality. They are also generally simple to use and maintain.
The Cons: Limited Features and Build Quality
On the downside, coffee makers under $100 might not have the premium features of higher-end machines, like customizable brew strength or built-in grinders. Additionally, the build quality may not be as durable, and you might need to replace them more frequently.
How to Maximize the Use of Your Coffee Maker
Tips for Getting the Best Brew
To get the best coffee from your machine, always use fresh, high-quality coffee beans or grounds. Pay attention to the water temperature (195–205°F is ideal) and make sure your coffee-to-water ratio is spot on.
Cleaning and Maintenance for Longevity
Regular cleaning is key to keeping your coffee maker in top shape. Descaling every couple of months (depending on your water quality) can prevent buildup and ensure your coffee tastes fresh.
Read: Modern L-shaped Outdoor Kitchen
Conclusion
A great coffee maker doesn’t have to cost a fortune. With options like the Hamilton Beach FlexBrew or the Bodum Brazil French Press, you can enjoy a delicious cup of coffee without breaking the bank. Whether you need a quick single-serve or a full pot to share, there’s a budget-friendly coffee maker out there to suit your needs.
FAQs [...]
Read more...